Copy a Canvas Course

Login to Canvas
Don't know how to login to Canvas? Learn how to login.
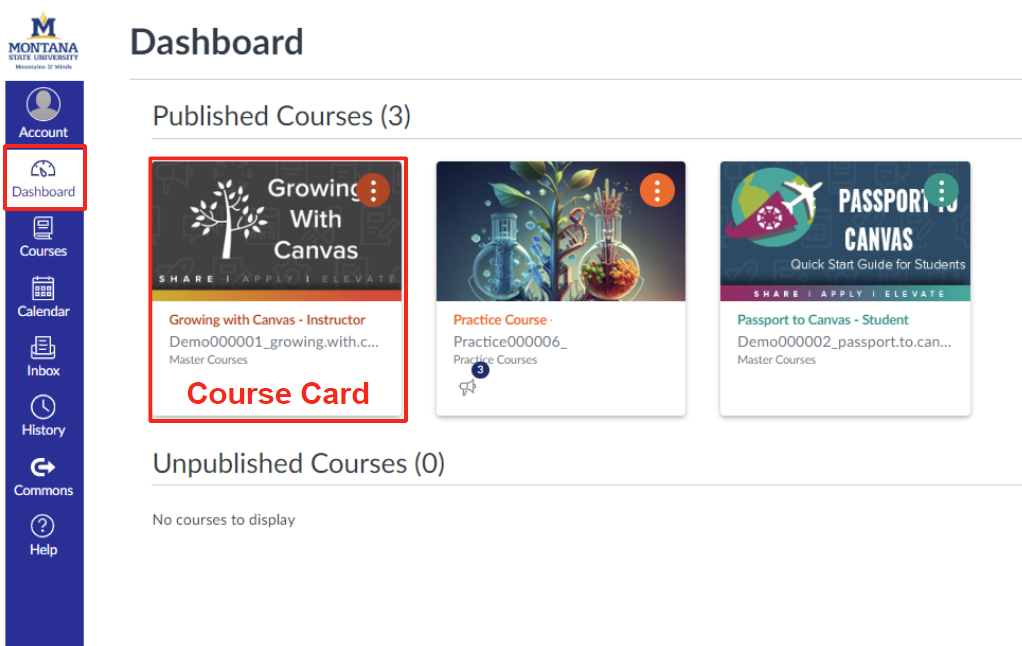
Navigate to Your Course
Click on your new course (your empty course) from your Canvas Dashboard.
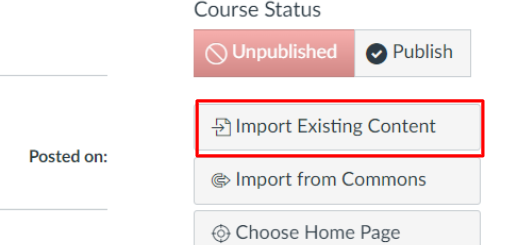
Copy Your Old Course
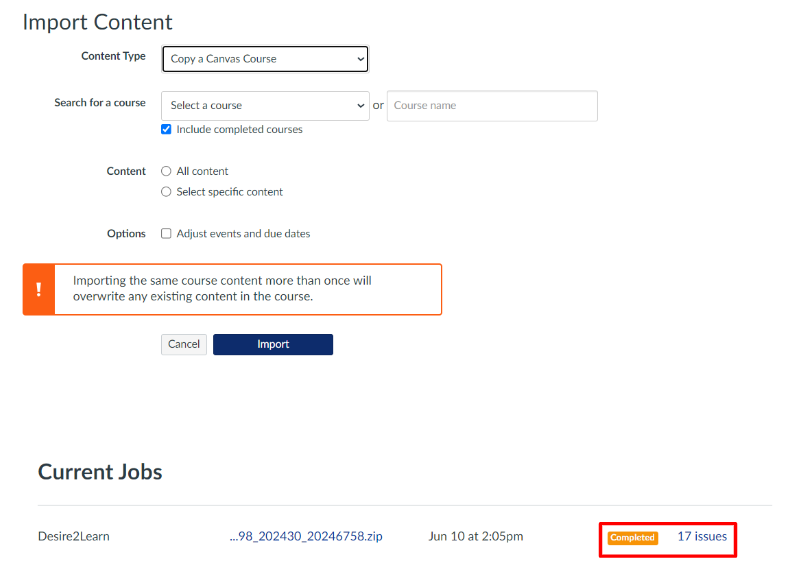
1. In the upper right corner of the new course, click Import Existing Content.
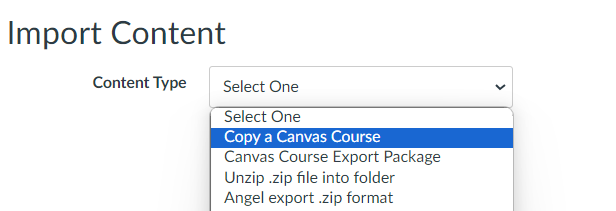
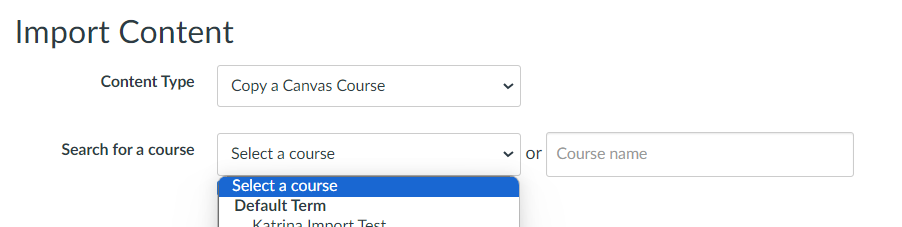
2. Select Copy a Canvas Course from the Content Type dropdown menu.
3. Select the course in which you wish to import content from in the dropdown menu or search for it by name.
4. Choose All Content to copy the entire course or Select specific content to copy only parts of the course.
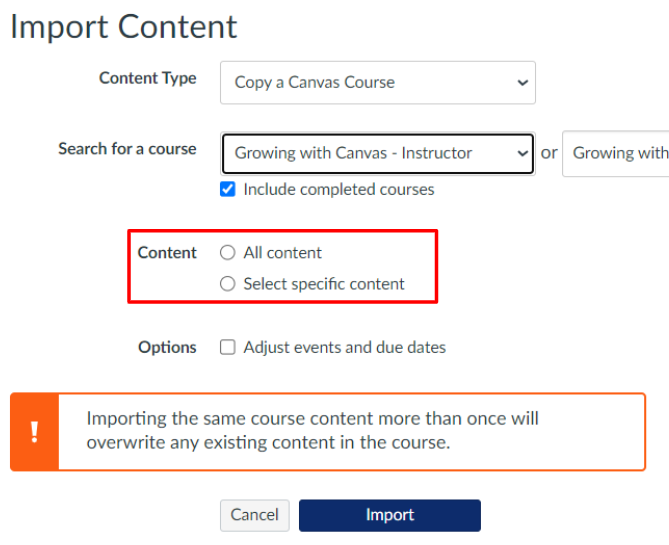
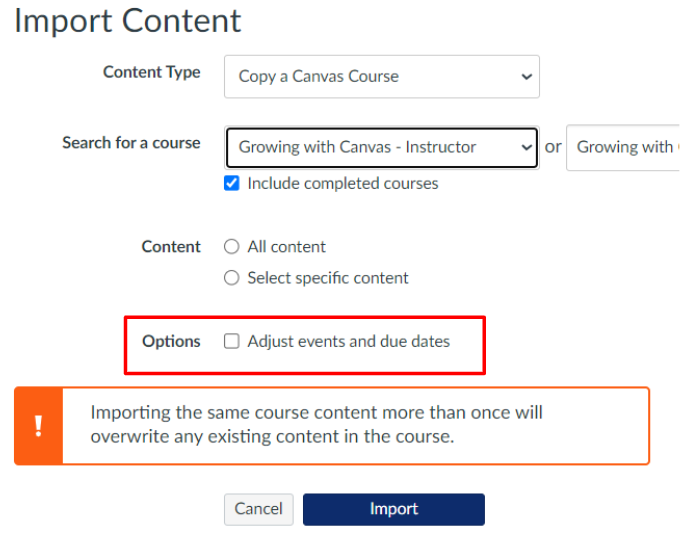
5. If you want to shift dates automatically from the original course to fit the new course’s schedule, check Adjust events and due dates and set the date adjustments as needed.
Note: You can also leave this unchecked and adjust dates manually as you build your course.
6. Click Import.
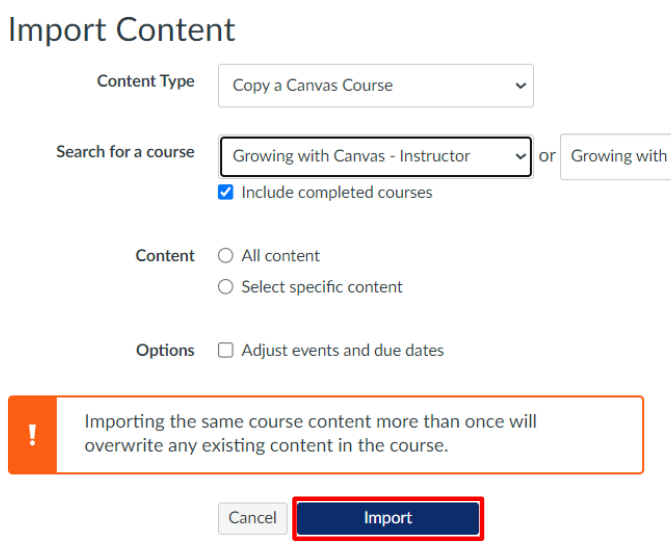
Note: The course copy process will begin, and you can monitor its progress in the "Current Jobs" section. Once complete, a notification will indicate the process is done.
Review your Content
1. Once the import is complete, review the associated issues by clicking on the numbered Issues link next to the completed box. This provides you with a log of issues to address.
2. Review the new course to ensure all content has been copied correctly and make any necessary adjustments.
Validate Your Links
Utilize Instructure's How do I validate links in a course? tutorialto check thatallyour course links (both internal and external) are functioning properly.
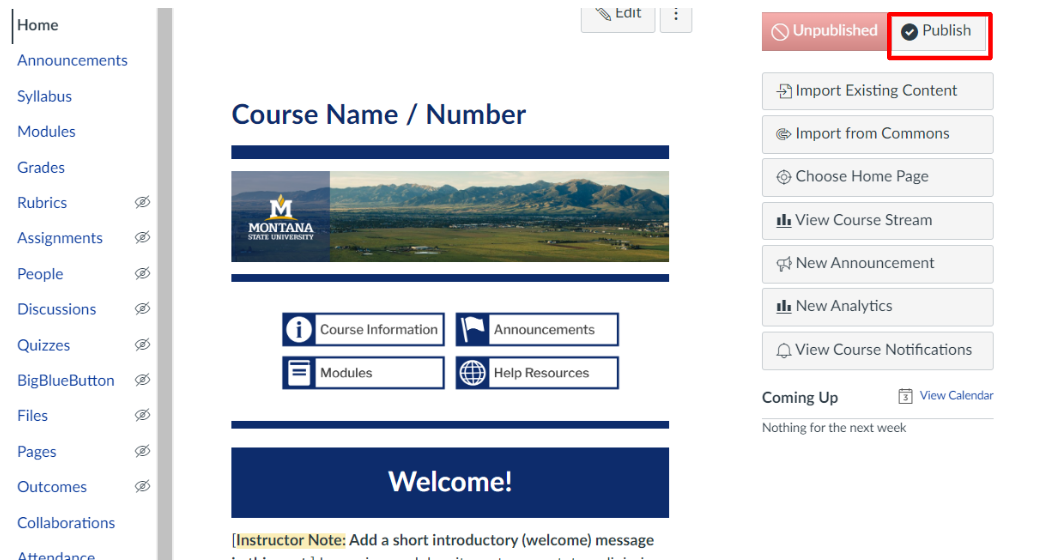
Publish
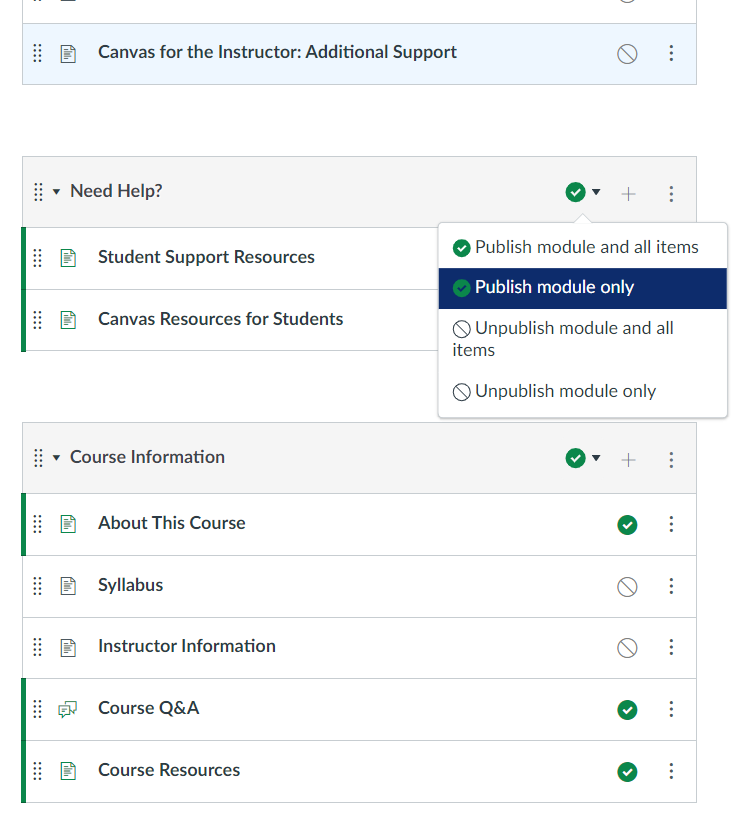
1. Review the assignments and modules that you would like students to see. Toggle over the publish icon to the right of each item. A green checkmark indicates it is published, and a white circle with a slash means it is unpublished.
2. Navigate back to your Homepage by clicking home from your course navigation menu.
3. Select Publish under “course status” on the right side of your homepage when you are ready to make your course public.
Note: Publishing your course does not change the publication status you have selected for specific items within your course such as assignments or modules.