
StudyMate Campus

StudyMate Campus can be used by instructors and learners to create flash cards, self-assessments, and learning games.
StudyMate Campus is embedded into Canvas. Selecting to go to the StudyMate area will take users to an external site which is the "My StudyMate Projects" area.
Access in the Course Navigation Menu
- Go into your Canvas course.
- Enable StudyMate in your course.
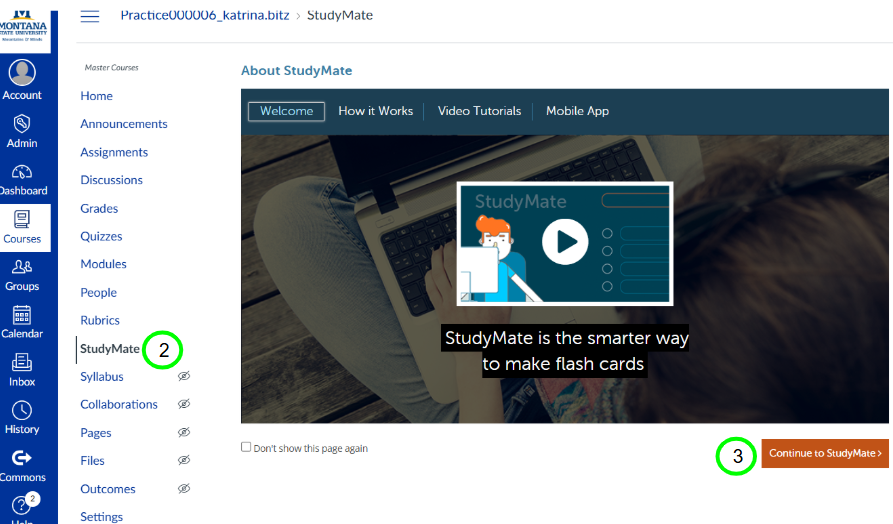
- Now that's it is updated and visible in your Course Navigation Menu, click on "StudyMate."
- Selecting the link displays an "About StudyMate" page. User's select the "Continue to StudyMate" link (lower right) to go to their personal "My Study Mate Projects" area.
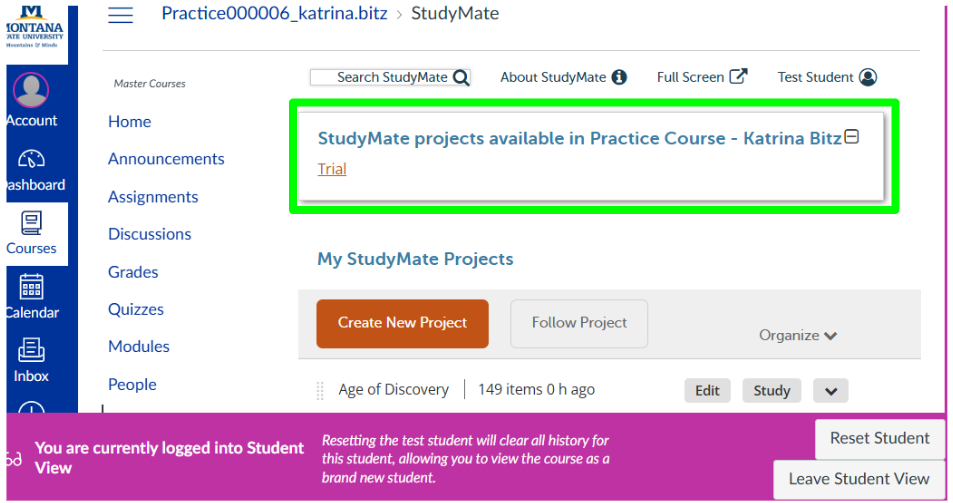
Note: If the user has StudyMate projects, they will appear in the 'My StudyMate Projects' area; otherwise, the initial screen will be displayed as seen below. After projects are created users can make them available in the course.
Start a New Project
Each set of definitions, games, or flashcards is contained in "Projects". To create a new project:
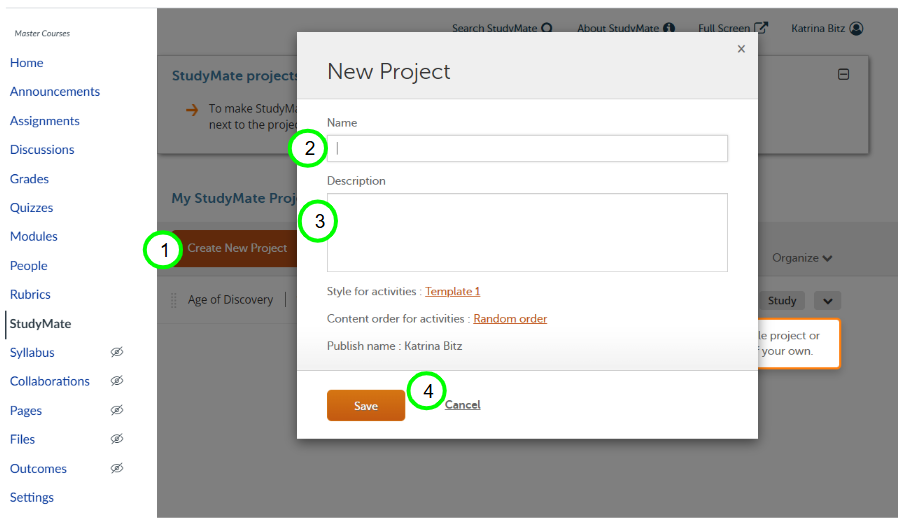
- Select Create New Project
- Provide a name for your project
- Provide a description. You and the course participants will identify the activity by these are the identifying factors.
- When you're finished, select Save
Edit a StudyMate Project
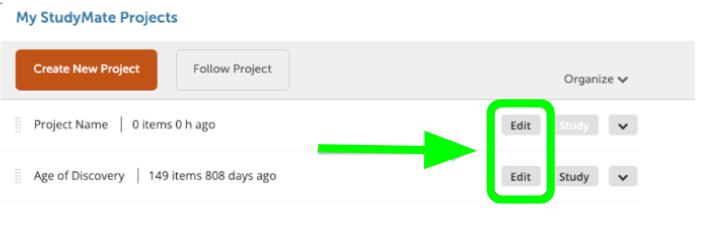
When you're working on your StudyMate project, you can add three types of content: Facts, Definitions, and Questions. You can enter the information manually or import it from an external source. Depending on the type of content you add, you will get different activity options, providing participants with a variety of study options. To add content, simply click on the "Edit" button located next to your project.
Add Facts to a Project
Facts represent objective information about the content you want to cover. Activities that course participants can use with Facts are:
- Fact Cards.
- Fact Cards Plus.
- 'Show All' Flashcards
Within the editing menu of a project:
- Select the Facts tab and choose Add Fact.
- Enter the fact.
- You may include a photo by using the camera icon.
- You may associate your fact with a topic by using the Add Topic option.
Add Definitions to a Project
Definitions typically clarify the essential characteristics or features of the thing being defined, helping course participants understand its nature or purpose. Activities that course participants can use with Definitions are:
- Flash Cards.
- Fill-in-the-Blank.
- Matching.
- Pick a Letter.
- Crosswords.
- Glossary.
- 'Show All' Flashcards.
Within the editing menu of a project:
- Select the Definitions tab and click Add Definition.
- Enter a term for your definition.
- Define your Term.
- Save or Add More to your definition.
Add Questions to a Project
Questions allow you to add one or more incorrect or correct variations on a term or topic. This may be beneficial for participants to truly understand how to distinguish the topic from near-identical terms or definitions. Activities that course participants can use with Questions are:
- Quizzes.
- Challenges (Jeprody-like study activity).
- 'Show All' Flashcards.
Within the editing menu of a project:
-
- Select Add Question.
- Provide your Question.
- Enter either multiple-choice or single-answer choices for your question.
- You may include a photo by using the camera icon.
- You may associate your fact with a topic by using the Add Topic option.
- Save or choose to "Add More" to your Question.
Make StudyMate Projects Available To Course Participants
Once you've organized your project content, you can share it with students via a URL or the StudyMate Canvas menu. If you choose the URL, students will participate anonymously, and you won’t be able to track usage. To track participation, it's recommended to use the 'Make Available in Course' option.
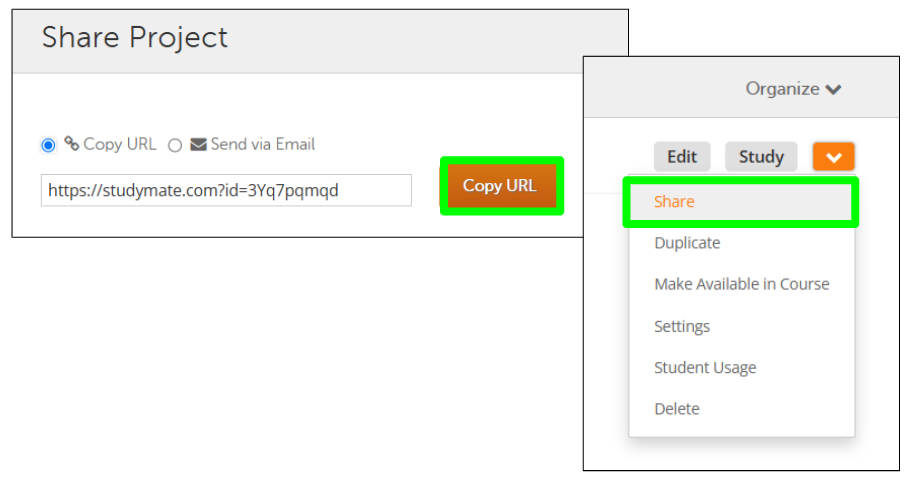
Sharing a Project with a URL
- Open the StudyMate menu.
- Select the arrow icon next to 'Study'.
- Select Share.
- Select 'Copy URL' or choose 'Send via Email'.
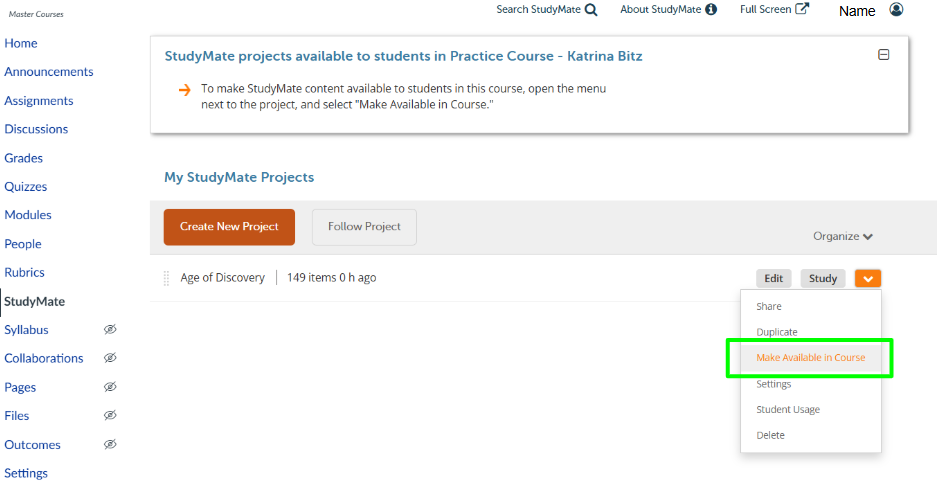
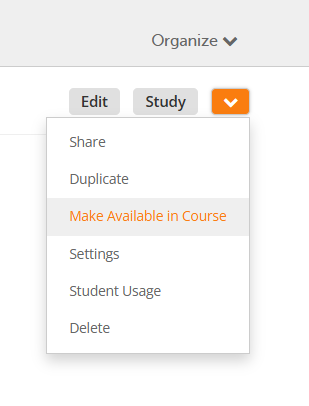
Sharing a Project with the 'Make Available in the Course' option
When you use the 'Make Available in Course' option, students will find the project on their StudyMate dashboard. To enable this:
- Open the StudyMate menu.
- Click the arrow icon next to 'Study.'
- Select Make Available in Course.
- A green star will appear, indicating the project is visible to course participants
5. You can use your "View as a Student" in your course to check that this works appropriately.
StudyMate Tutorials
- Respondus StudyMate Campus Overview Instructional Video
- StudyMate Campus support documentation
- Instructor Tutorials -StudyMate support documentation.