Import and Update Your MSU Sample Module
This tutorial will guide you through utilizing the MSU Sample Module you imported from Canvas Commons.
Import Content
1. After reviewing the resource and deciding to import it into your course, click Import/Download to start moving the content into your course, or Back to Search to explore other resources.
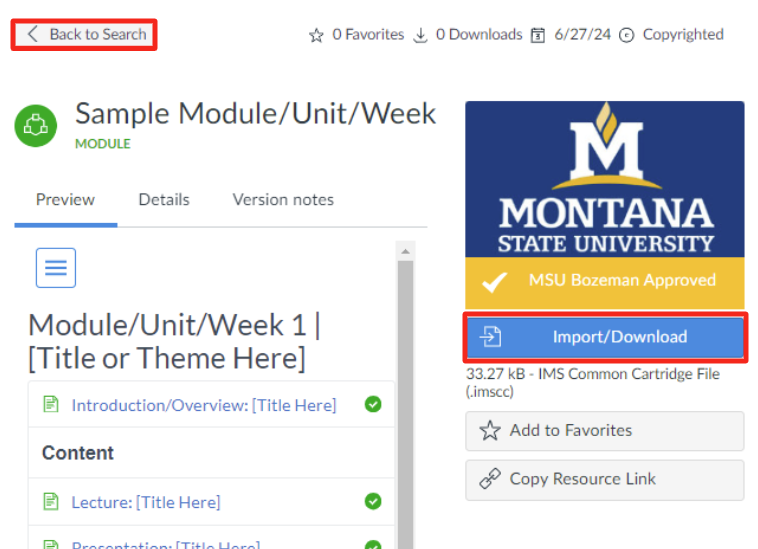
Note: When you click Import/Download, a menu will appear on the side with options for import or download.
2. Select the course you would like to import the content into and click Import into Course.
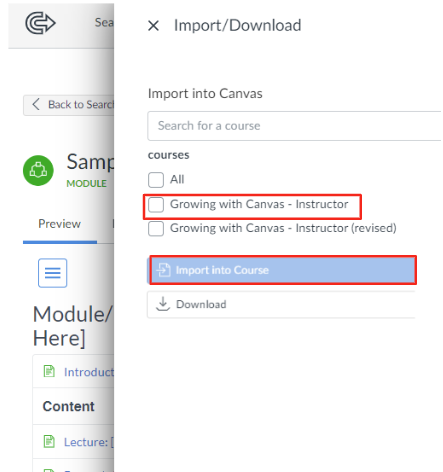
3. You will receive a message confirming that your import has successfully started.
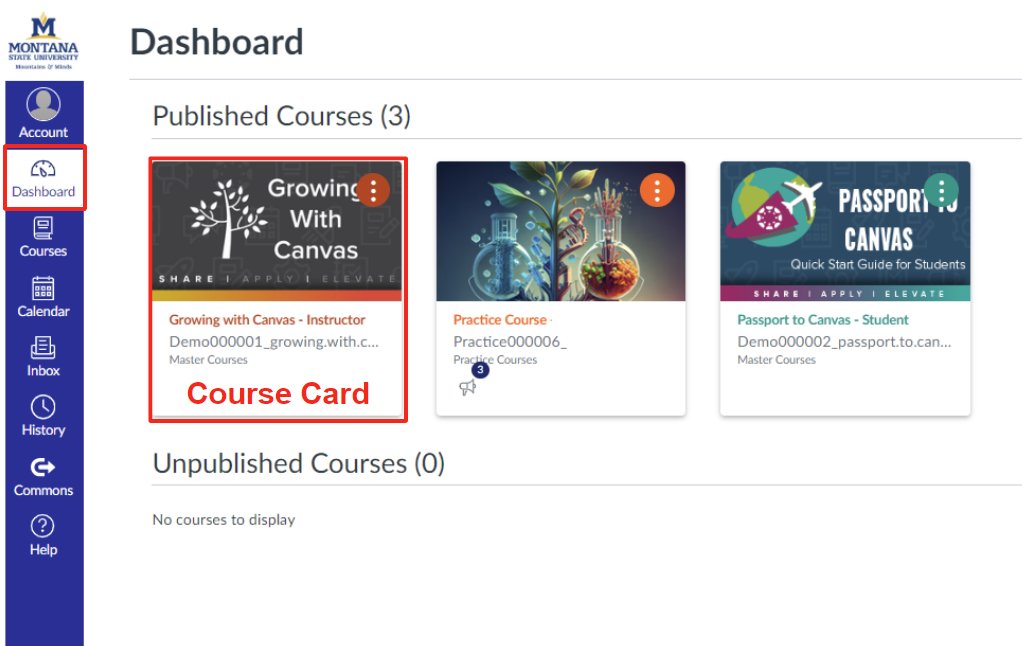
To view the import, navigate back to your course by clicking on Dashboard in your Global Navigation.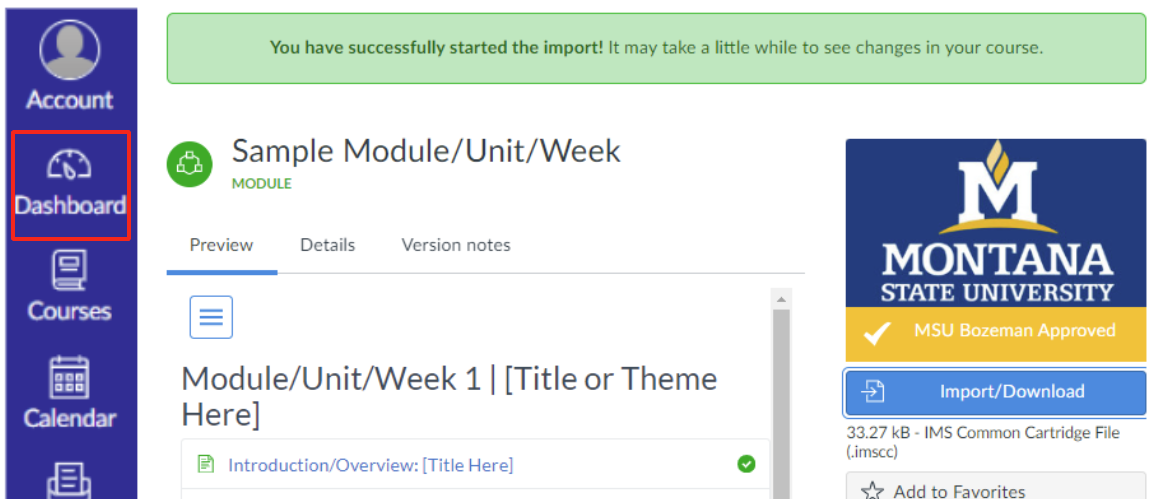
Navigate to your Course
When you log in, you will be in your Canvas dashboard. Select the desired course by clicking on the course card.
Navigate to your Modules
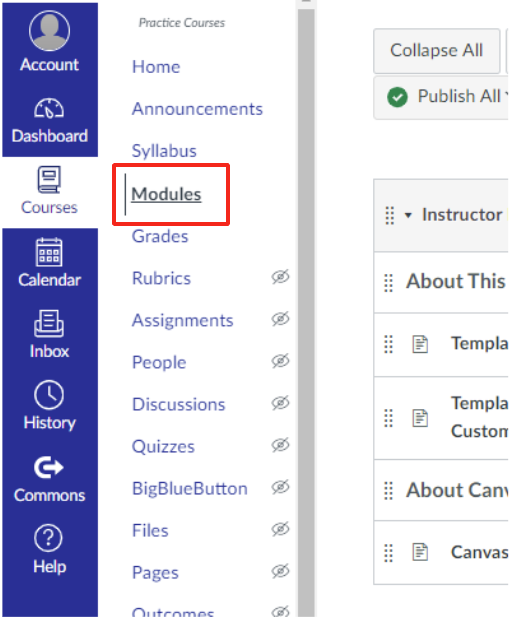
Navigate to your Modules by selecting it from your Course Navigation Menu. This will take you to your premade module with content samples. These may be used as a guide or duplicated to fill your course.
Copy Module
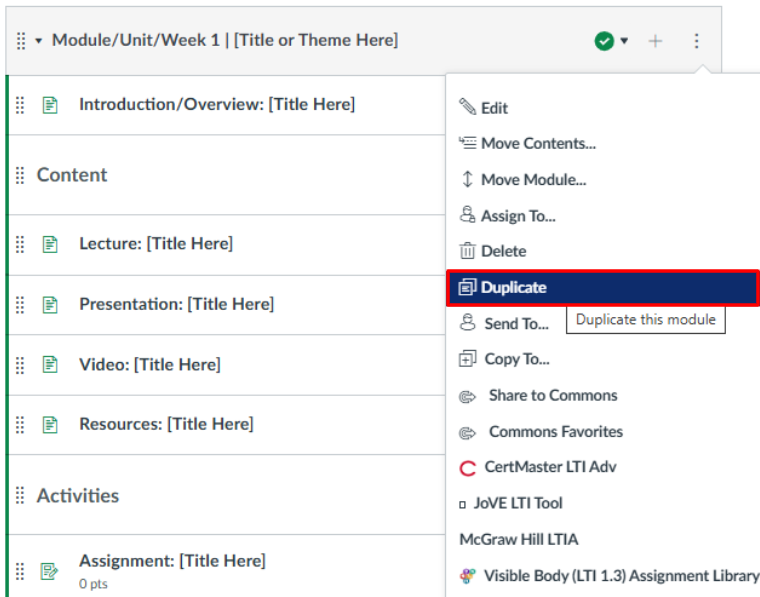
- You will need to copy the module as many times as necessary to fit your course (ex. # of units, topics, week, etc. in your course).
- Click on the three dots on the right of the module title, scroll down, and select "Duplicate."
- Repeat as many times as needed until you have created the desired number of modules.
Add Content
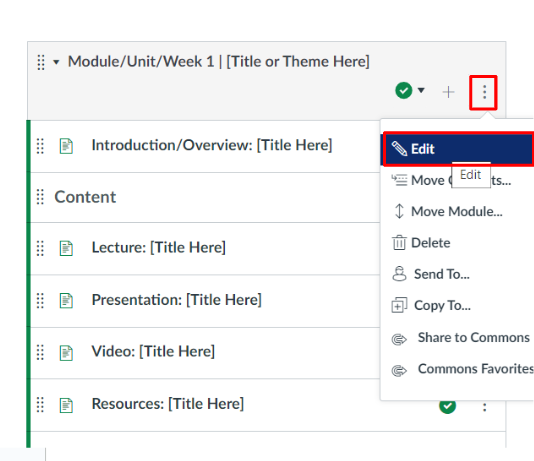
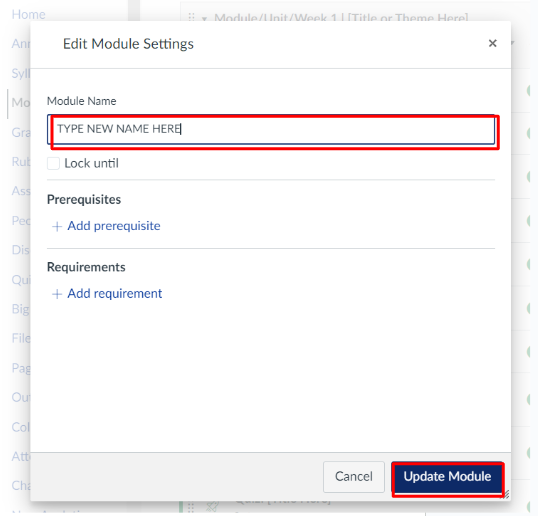
- Rename your modules to fit the structure of your course by clicking the three dots on the right of the Modules title bar and selecting Edit.
- Delete the provided title and type in your own. Once finished, click Update Module.
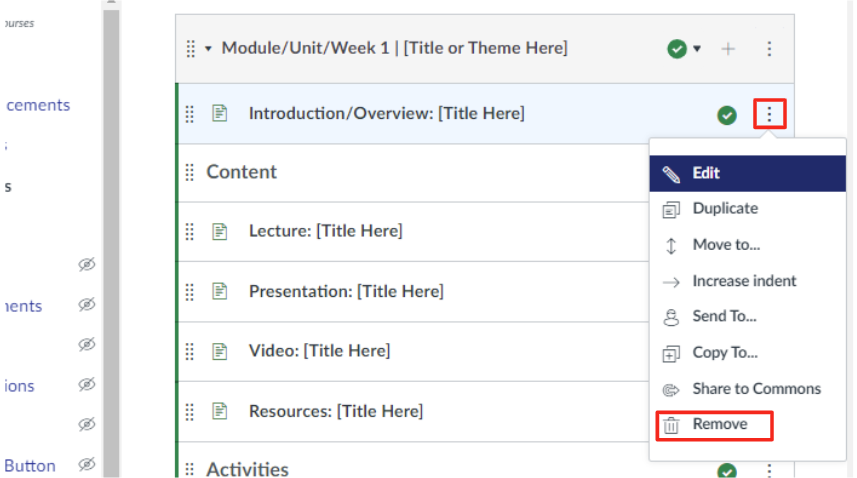
- Identify content that will not be necessary in each module and delete the content item(s) by clicking on the three dots to the right of the activity and selecting Remove.
- To create additional template content, choose the specific item (ex., assignment),
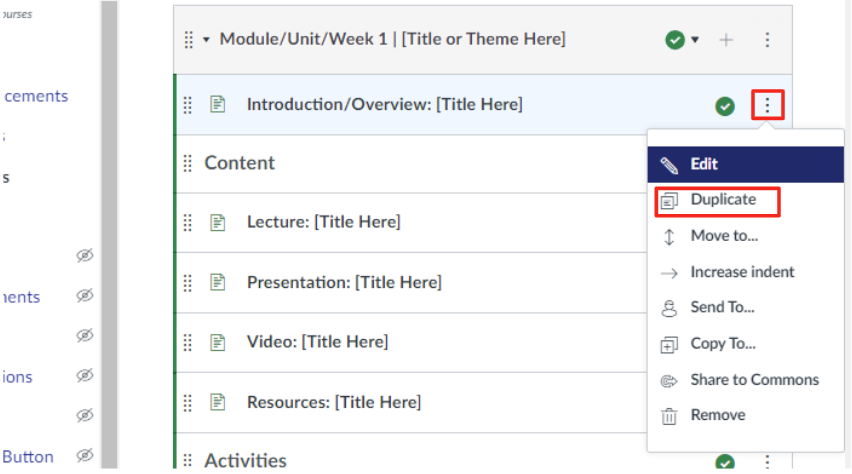
click on the three dots on the right, and select Duplicate. This will make a copy of the item right below your original.
- Review the Canvas tutorial on how to add non-template items
Edit Content
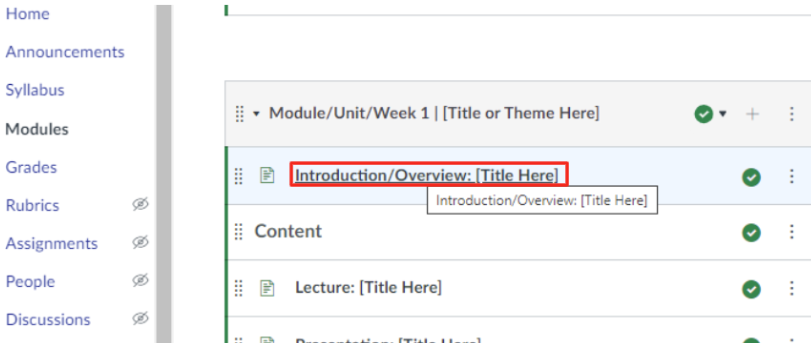
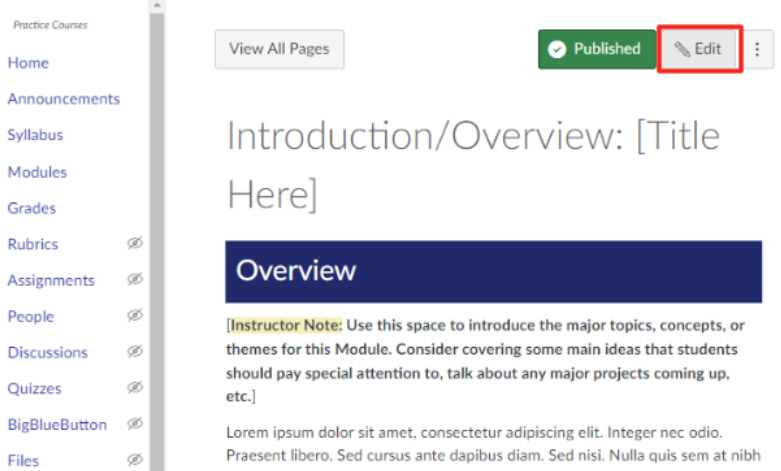
- Edit each item individually by clicking on the name. This will load the item's details or settings page.
- Then select Edit in the top right corner. This will take you to the edit window.
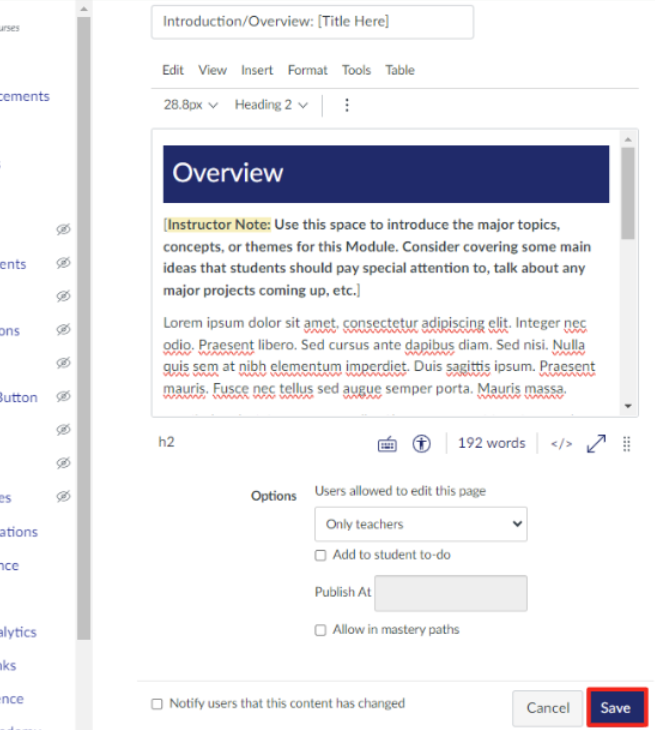
- Make your adjustments in the edit window and click Save when you're done to keep your changes.
Reorder and Organize Content
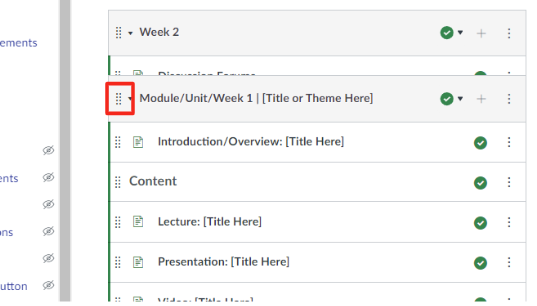
Reorder and organize your content items by clicking and dragging the eight dots on the left of the item to the desired spot.
Note: You can move items within modules or to new modules.
